Follow Up Photos of MiniDexed Project

I did take pictures with the pisound project and MiniDexed project together. You can see what I did to the project box by comparing the original pisound and my MiniDexed. Note that the pisound uses a Raspberry Pi 3b+ and my MiniDexed uses a Raspberry Pi 4b (8 GB). The pisound case I got for the MiniDexed comes with different panels for the different versions of the Raspberry Pi.

Picture of MiniDexed (on the left) and pisound (on the right) viewed from above.
The MiniDexed on the left, the pisound on the right, view from the top.

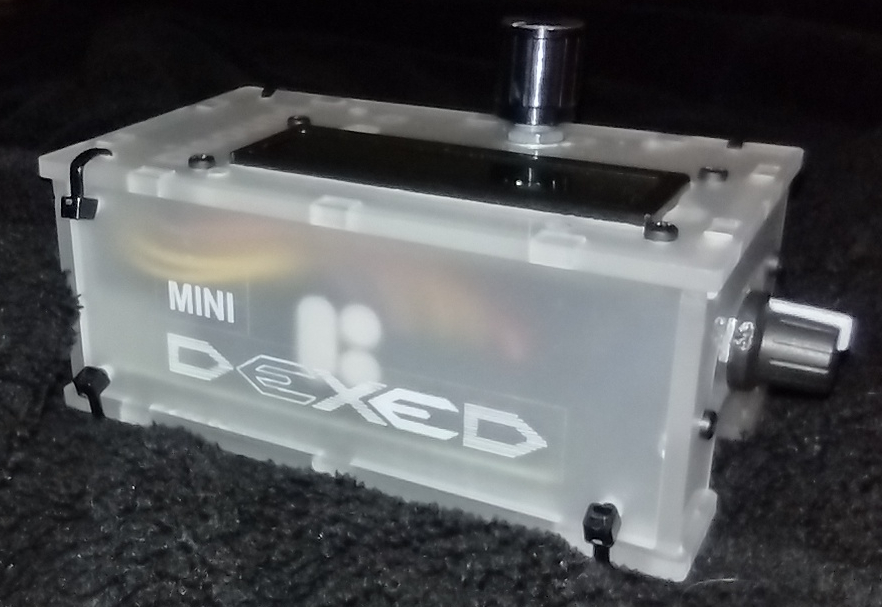
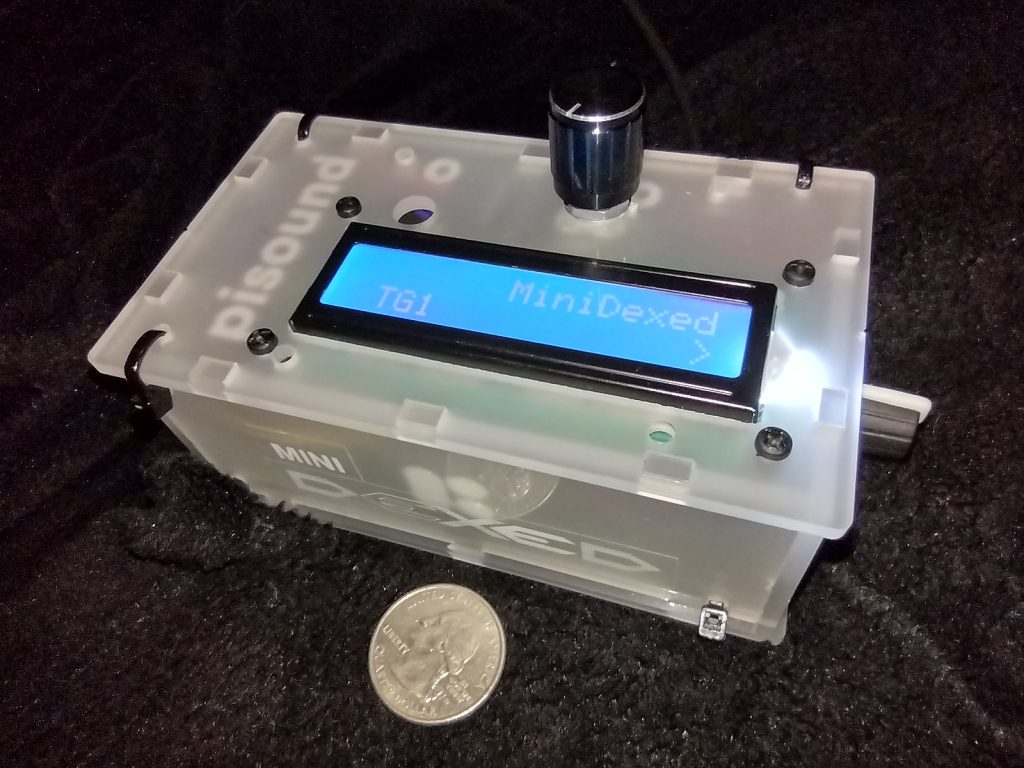
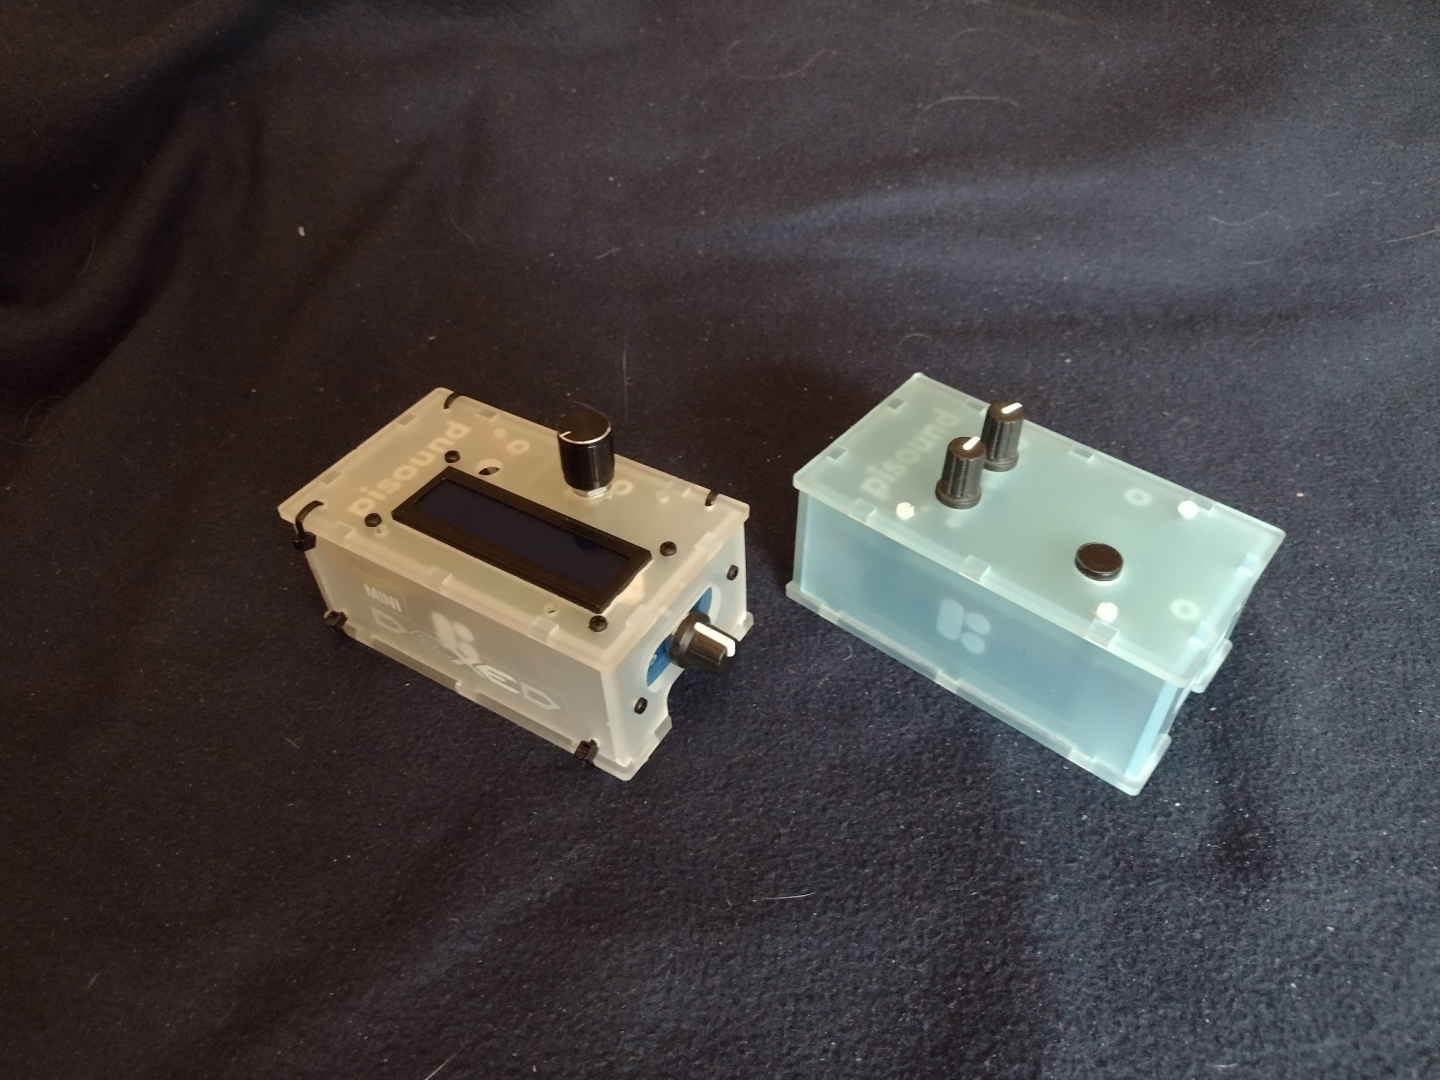
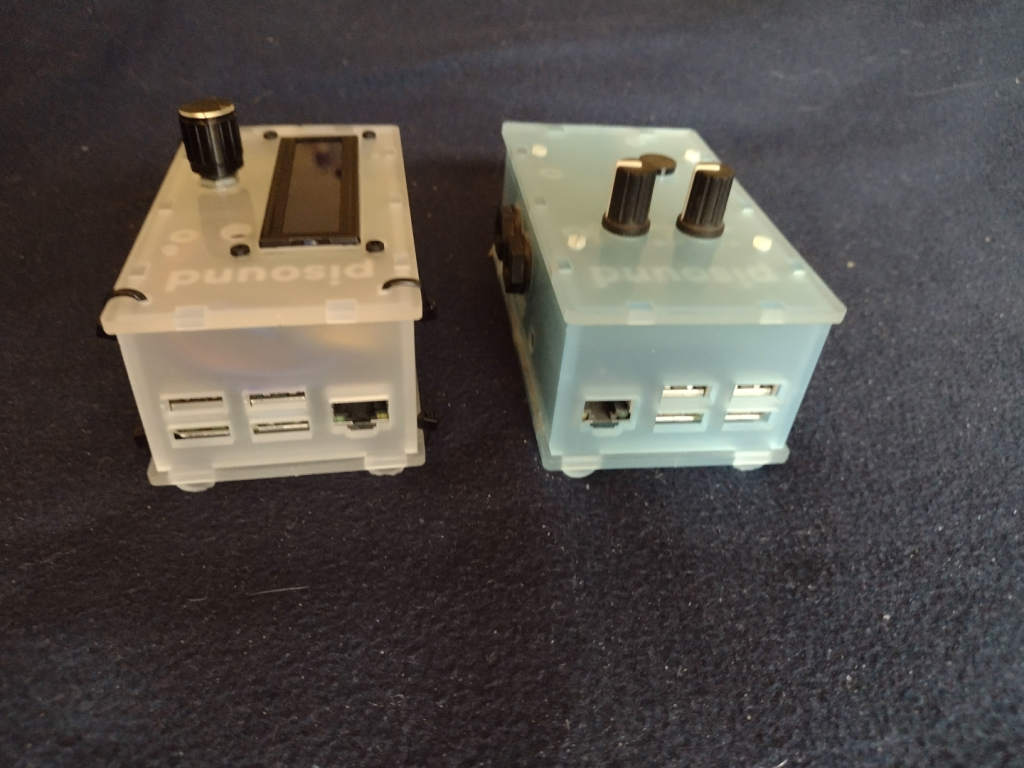
The MiniDexed on the left and the pisound on the right. Here the MiniDexed has the LCD panel and Encoder Knob on the top, and the LCD Contrast Knob on the Right Side. A hole was drilled for the Encoder Knob as you can see on the pisound there is no hole there. You can see the Zip Ties I used in all the pictures.

Picture of the MiniDexed (on the left) and the pisound (on the right) viewed from the front.
The MiniDexed on the left, the pisound on the right, view from the front.

On the MiniDexed I added a pair of labels to show the MiniDexed Logo. Originally I was going to use Black in. But I didn’t have any black-on-clear label tape, only the white-on-clear. It works ok, but not as well as I wanted. I got the logo from the Facebook MiniDexed page. I like their logo. You can see the LCD Contrast Knob on the right side of the MiniDexed. There are only three Zip Ties on the front face because the LCD Module Circuit board is in the way. I had to put the LCD Module close to the Front side so I could squeeze the Encoder Module at the back side.

Picture of the MiniDexed (on the left) and the pisound (on the right) viewed from the right side.
The MiniDexed on the left, the pisound on the right, from from the right side.

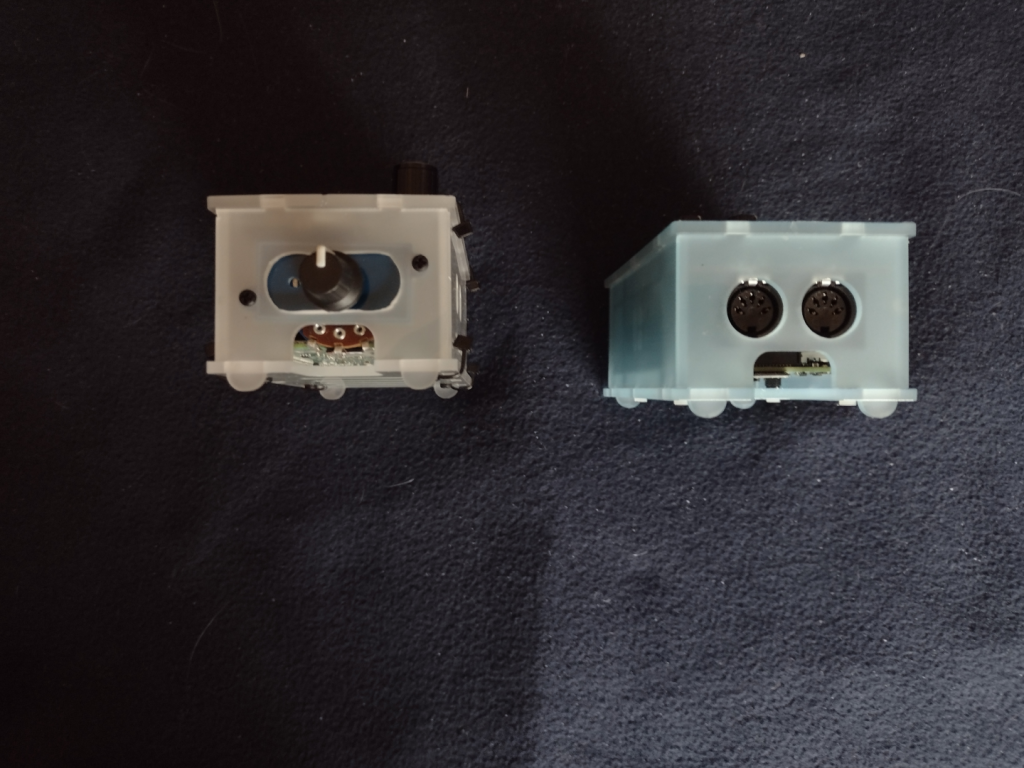
The LCD Contrast Knob is attached in the modified MIDI ports holes. I cut out the bridge between the two MIDI port holes to make one larger hole. Then I used a filler plate from the RC2014 project case. The potentiometer for the contrast is large and you can see it through the micro SD Card Slot window. Taking out the micro SD card on the MiniDexed will require some disassembly to get to it. On the pisound, the micro SD card is accessible.

Picture of the MiniDexed (on the left) and the pisound (on the right) viewed from the back.
The MiniDexed on the left, the pisound on the right, from the back.

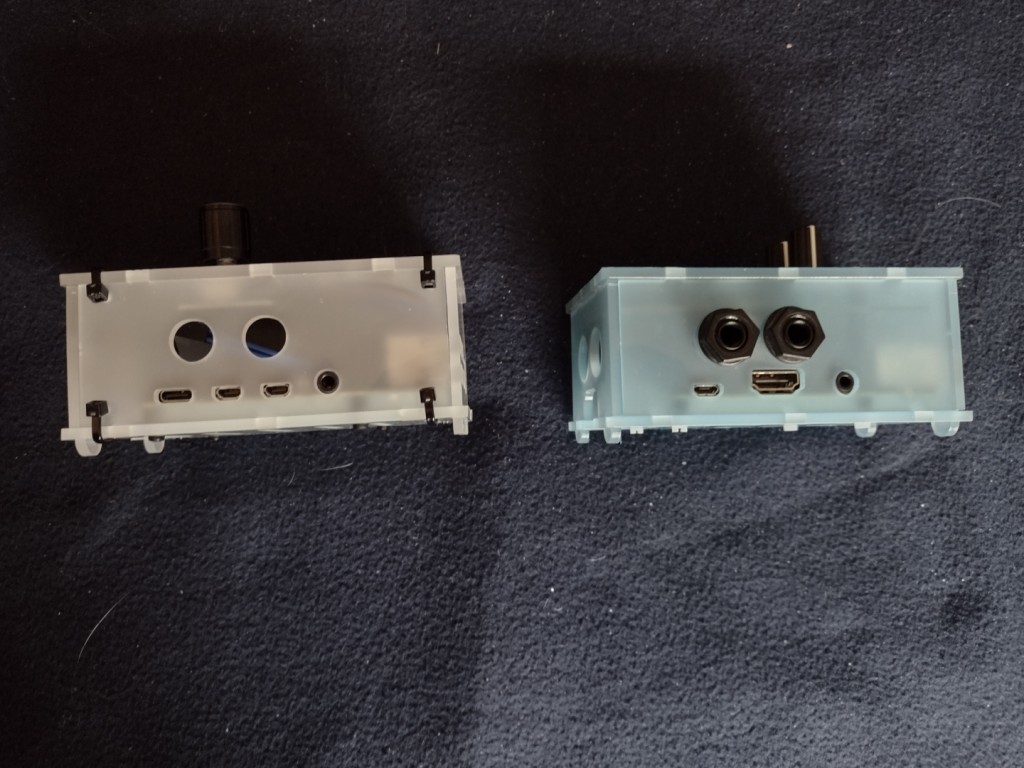
The differences between the Pi3b and Pi4b are somewhat obvious here. Note that the 6.5mm audio jack ports from the pisound are not used on the MiniDexed. There really isn’t room inside the case for the Audio DAC circuitry because of the LCD Module and the Encoder Module.

The Pi4b has a USB C port for power, two micro HDMI ports for video (not used for the MiniDexed), and a 3.5mm port for the Audio. On the Pi3b+ for the pisound, there is a micro-USB for the power, a single full size HDMI and a 3.5mm audio jack (neither is used on the pisound). The 3.5mm audio jack on both the Pi4b and the Pi3b+ include a forth conductor for composite video. On the Pi3b+ and older Pi models, the audio was considered inferior, which is why the pisound has the Audio DAC circuitry and the two (Stereo In and Out) 6.5mm jacks.

Picture of the MiniDexed (on the left) and the pisound (on the right) viewed from the left side.
The MiniDexed on the left, the pisound on the right, from the left side.

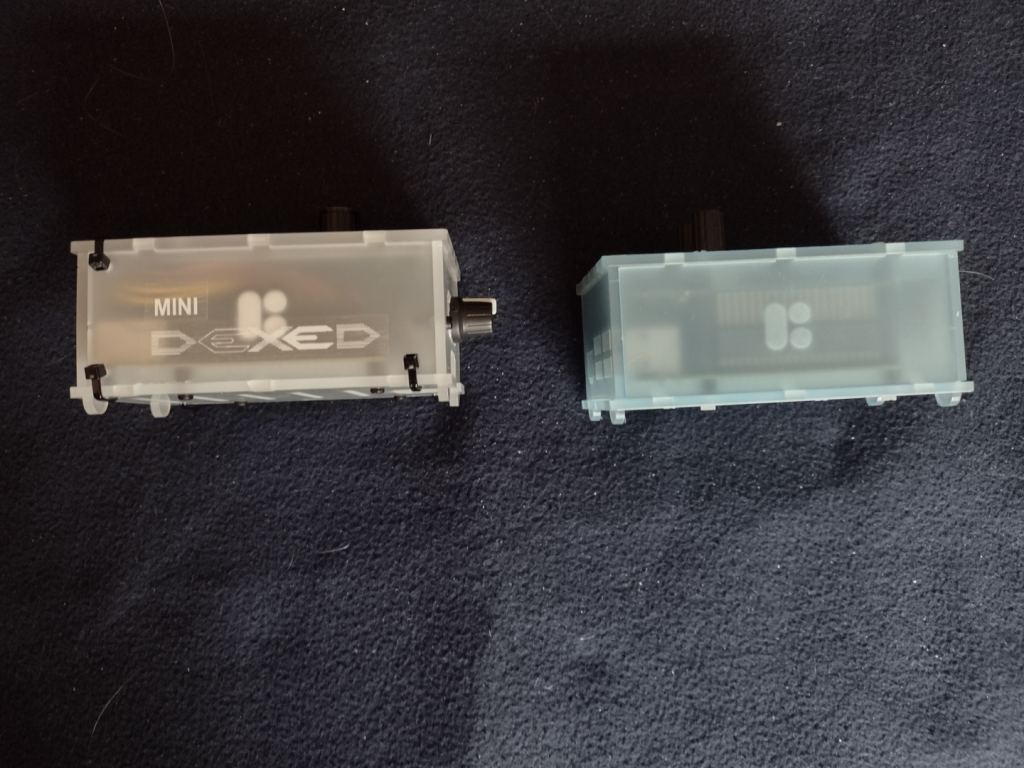
I had to abandon the straight on photo of the side panel for the left side because of the LCD Contrast knob on the right side of the MiniDexed. This shows another difference between the Pi3b+ and the Pi4. The Ethernet port swaps sides with the USB ports.

Picture of the MiniDexed (on the left) and the pisound (on the right) viewed from the bottom.
The MiniDexed on the left, the pisound on the right, from the bottom.

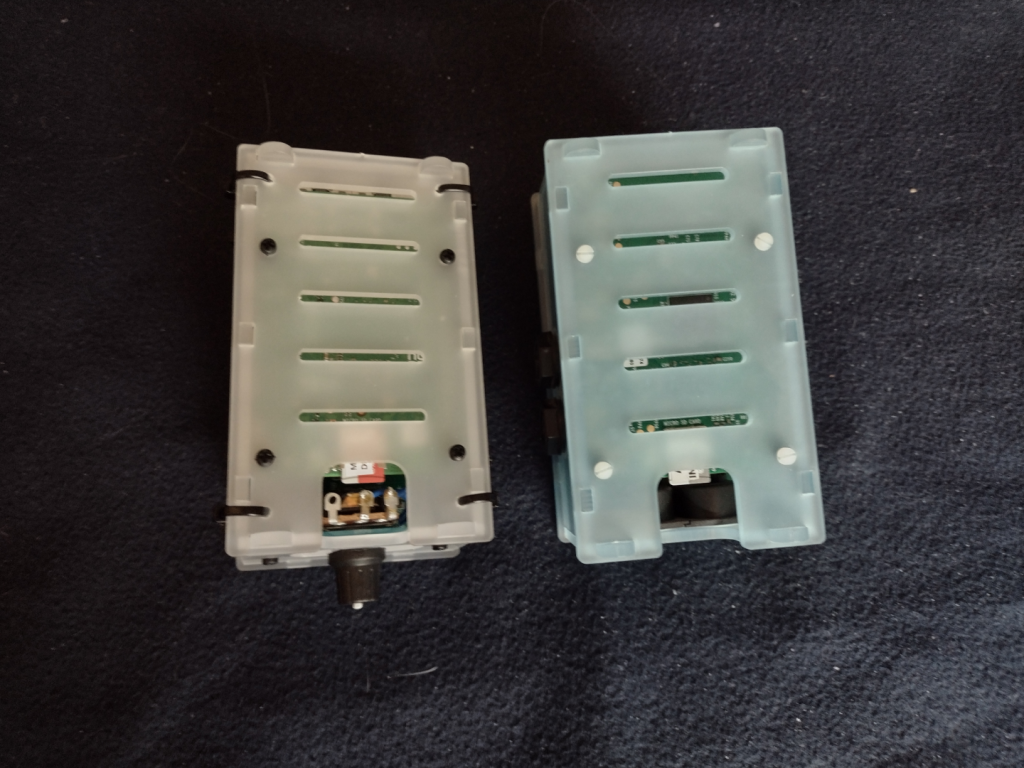
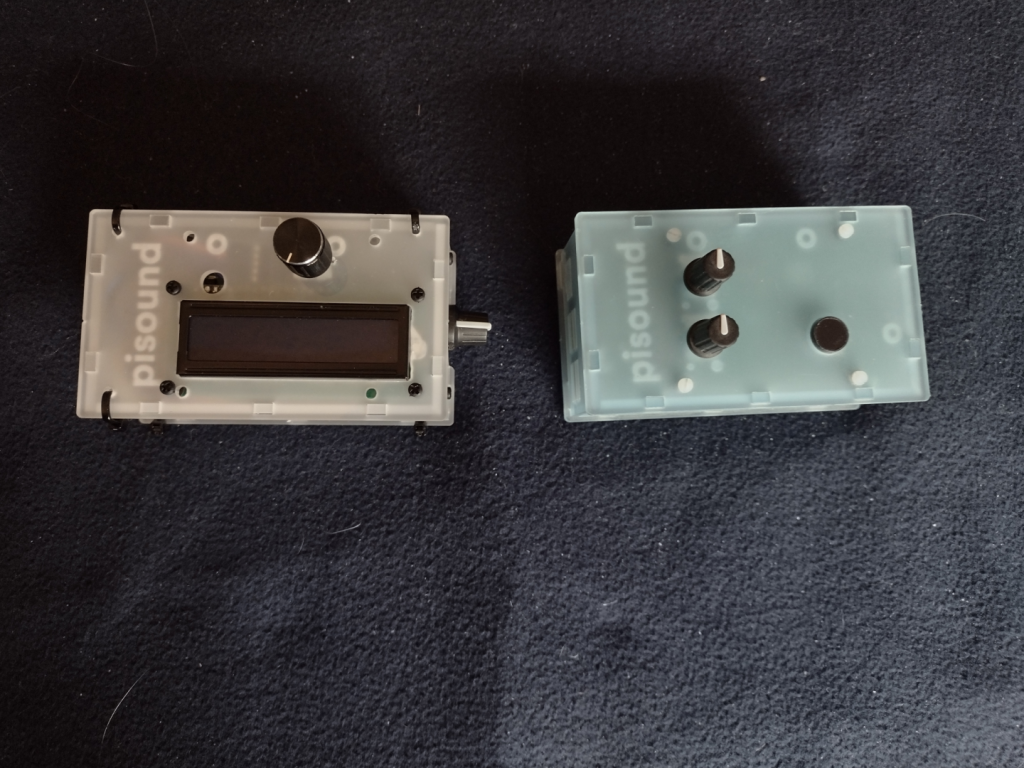
From the bottom you can see how the MiniDexed LCD contrast knob potentiometer takes up valuable space needed to access the micro SD card. I’ll have to cut out all the Zip Ties to make changes to the micro SD card. I will consider replacing that potentiometer with a smaller potentiometer if I ever need to get to the micro SD card.

Picture of the MiniDexed (on the right) and the pisound (on the right) viewed from their front right corner.
The MiniDexed on the left, the pisound on the right, from the top front right corner.

This is kind of a “glamour shot” of the two projects showing off the top, front, and right sides.

Picture of the MiniDexed (on the left) and the pisound (on the right) viewed from the top left rear corner.
The MiniDexed on the left, the pisound on the right, from the top left back corner.

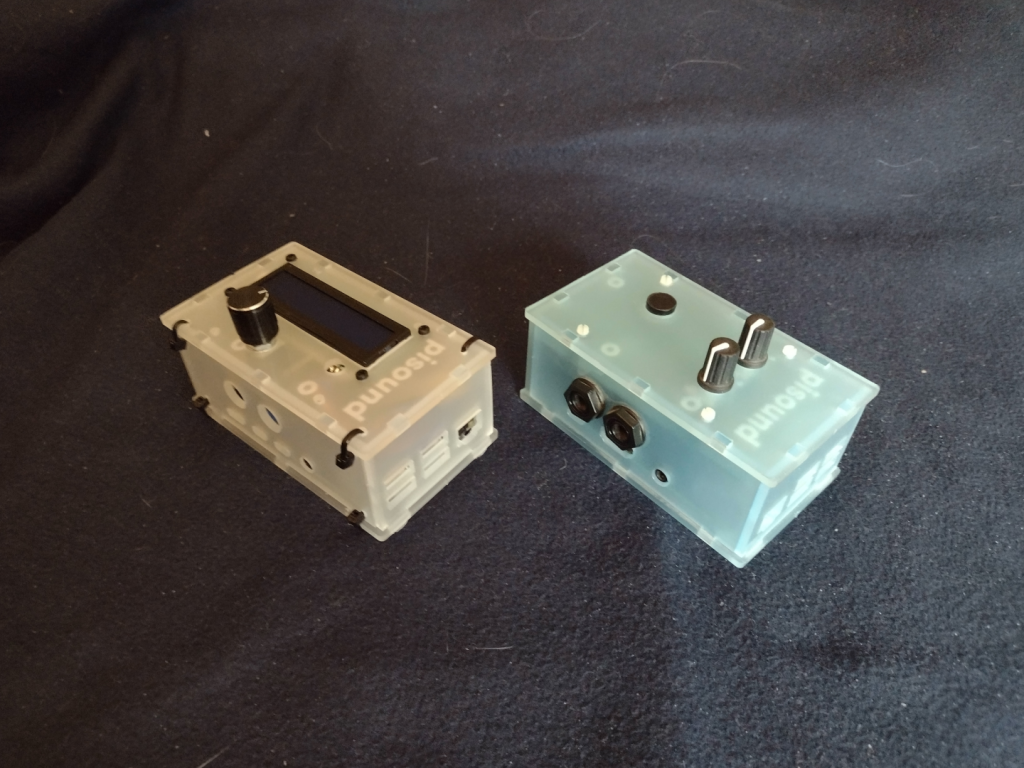
The final shot of the two projects showing off the top, left, and back sides.

The MiniDexed is a bit of a tight fit into the pisound project case, but it works, and that is the point.

My MiniDexed Project is complete!

MiniDexed in final project box

I’ve posted about my miniDexed project a couple of times before (Here and Here). I finally got my real miniDexed Project Box for it completed. It turned out well. I did have to buy a coping saw so I could cut the LCD panel hole. I also needed to drill out holes for the Encoder/Button knob, and for the LCD Contrast knob. And then a bunch more holes for the Zip Ties to hold the box together.

Photo of MiniDexed Yamaha DX7 Emulator in a pisound project box.
MiniDexed Yamaha DX7 emulator in it’s pisound project box. Quarter coin for scale.

I put together a little logo from the one used on the MiniDexed Facebook group and fixed that to the side of the project box. I really wanted black ink on the label, but I didn’t have any Black-On-Clear label tape. It’s actually two labels, the MINI on a short strip and then the DEXED in a larger “font” (not really a font, it isn’t even actual text, just a PNG of the text). On the top is the Encoder/Button knob. On the right side in the picture is the LCD Contrast Control knob. Around the side to the left are the Raspberry Pi I/O ports, 4 Type A USB (two USB3 and two USB2) and the Ethernet port. On the back side are the two Micro-HDMI video ports, a 3.5mm audio jack (with composite video), and the USB Type C for power.

I chose the Raspberry Pi 4 8GB model because the audio on the combined Audio/Composite video jack is supposed to be better than it was on the previous Raspberry Pi models. It is better, but an actual DAC sound module would be better still. But the DX7 wasn’t the cleanest sound, so there is that, too. The pisound that I have uses a Raspberry Pi Model 3 model with a special Audio board to avoid the sound issues, and a MIDI board. I didn’t try to add MIDI to my miniDexed, though I think others do. I will depend on USB MIDI. I did test that with my Yamaha Reface DX (Yamaha’s modern mini FM Synth). I’ll need to get a shot of the Yamaha Reface DX and the miniDexed together.

I’ll take some shots of the miniDexed and the pisound side by side for a comparison in a future post. The pi sound is a cool idea. I haven’t really taken advantage of it yet, and I’ve had it a long time – at least by October 2018.

One thing about the miniDexed is that it is really eight DX7 engines running together. Like a TX816